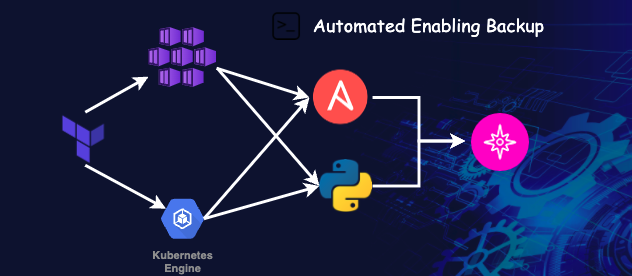
Automated enabling backup
In the first post, we wrote about the requirements for an optimized DevOps environment. In the second, we provisioned the Kubernetes cluster with NetApp storage.
As soon as applications run in the Kubernetes cluster and generate data, there is no getting around the topic of backup. Astra Control is used as the backup solution.
Astra Control is NetApp’s solution for Application-Aware Backup of Kubernetes apps. Astra Control backs up application metadata in addition to PVCs. Thus, entire applications can be restored. For this purpose, well-known NetApp technologies such as SnapShots are used. Snapshots are stored on S3 storage. If applications require special handling before and after SnapShots are created, special execution hooks can be created.
However, before you can automatically add the Kubernetes cluster to Astra Control Center, you must first make preparations on the Astra Control Service:
- Generate API token
This short video shows how to generate the API Key:
Now that the API key has been generated, let’s look at the tools that can be used to add a Kubernetes cluster to Astra Control.
- NetApp Astra Control Python SDK
- Ansible Playbook
The basis for both tools is the access to the Rest API. To perform actions it is necessary to get UUIDs for individual objects. To succeed, you need to perform the following steps.
- Get Cloud Provider Id
- Get Kubernetes Cluster Id
- Get Default StorageClass Id
- Enable management of Kubernetes Cluster
NetApp Astra Control Python SDK
NetApp provides the Astra Control Python SDK on GitHub. This can be downloaded via
git clone https://github.com/NetApp/netapp-astra-toolkits.git
To get it running, some Python programs have to be installed. Detailed installation instruction is available on the GitHub repository.
Based on the four steps above, the use of the toolkit is as follows:
List of available cloud provider:
./toolkit.py -oyaml list clouds
    48cc550d-3b69-49d9-9515-0b1f8b20f35e:
    - Azure
    - Azure
    bc96b574-cb68-4113-9693-6438020cc27b:
    - GCP
    - GCP
List of available clusters and search for the IDs of the previously created Kubernetes cluster:
./toolkit.py -oyaml list clusters
Output:
    71aab527-0912-447e-a2cd-54ece8eb3305:
    - fabianb-holy-mink
    - aks
    - unmanaged
    - 48cc550d-3b69-49d9-9515-0b1f8b20f35e
List the available storage classes:
./toolkit.py -oyaml list storageclasses
Output:
48cc550d-3b69-49d9-9515-0b1f8b20f35e:
  08ca2a26-b2bd-499a-a031-23522d77d40b: {}
  258aa38c-353c-4c94-b421-c3e7a630b70f: {}
  71aab527-0912-447e-a2cd-54ece8eb3305:
    472f6719-3fd8-400d-8423-55a4f62215a8: azurefile
    589c626a-1b58-4785-b445-ba777a151f7c: managed-csi-premium
    5e7c0e49-378c-49a7-83a9-8d2cd4856753: managed
    6b55adbf-74ea-4f59-8929-b82f14ea56c4: default
    ab215262-438f-4bfc-864e-1a8649795cde: azurefile-premium
    aef790c4-2050-49e9-9d0b-f31604e9d166: azurefile-csi-premium
    ba6d5a64-a321-4fd7-9842-9adce829229a: netapp-anf-perf-standard
    c78e3e2f-184c-45aa-bfd6-dcacf5b7750c: managed-csi
    e8e0163f-3b42-4589-9b22-aeabbf7fab03: azurefile-csi
    ff184761-6b2f-48df-9716-8f0c9f1b50fd: managed-premium
  9e67112f-e14a-4a3e-b6b2-13bb0f9816ad: {}
bc96b574-cb68-4113-9693-6438020cc27b: {}
Now that all the IDs are there, set the cluster to managed:
./toolkit.py manage cluster 71aab527-0912-447e-a2cd-54ece8eb3305 ba6d5a64-a321-4fd7-9842-9adce829229a
Alternatively, Ansible Playbook can be used, which is available in the GitHub repository build-demo-environment.
The Ansible playbook
For the execution of the Ansible playbook, the following two parameters must also be adjusted in the variable file:
clustername: „clustername“
storageclassname: „default-storage-name“
cloudprovidername: „Azure / GCP“
Now you can run the playbook:
ansible-playbook add-cluster-to-acs.yaml
After the Kubernetes cluster has been successfully added to Astra Control, you can manage your applications. How this works has already been shown in this Video (which is currently only available in German - sorry for that).
Resources
GitHub Repository for this Post


