The last article shows, how you should prepare your environment. This post describes the configuration of GitLab and Jenkins.
Jenkins configuration
At first Jenkins has to be configured. This will be done by WebUI, which is reachable by http://NODE_IP:8080/login
After a successfull authenication you will redirect to the Jenkins Dashboard.
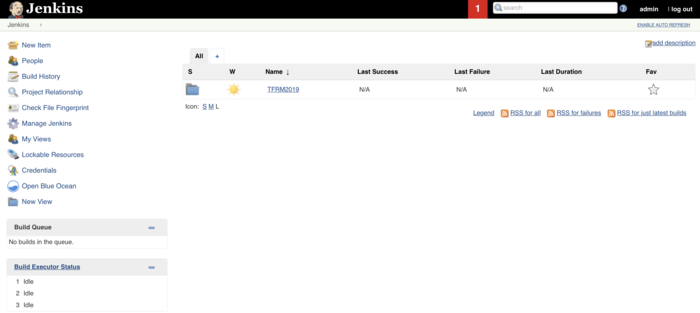
Configuring Credentials
For the CI/CD demo with the WebApp requires some credentials:
- for Docker Hub, for uploading the Docker image
- GitLab for reading the files or starting the WebHook
Credential for Dockerhub
On the left side go to “Credential” -> “System” -> “Global credential (unrestricted)” -> “Add Credential”
Now enter your dockerhub credential:

Important: ID must be docker-hub-cred
Press “save” to save the configuration.
Credential for GitLab
Before your create the gitlab credentials you need the api key of your gitlab account.
Login to your gitlab account -> goto Settings -> Access Token
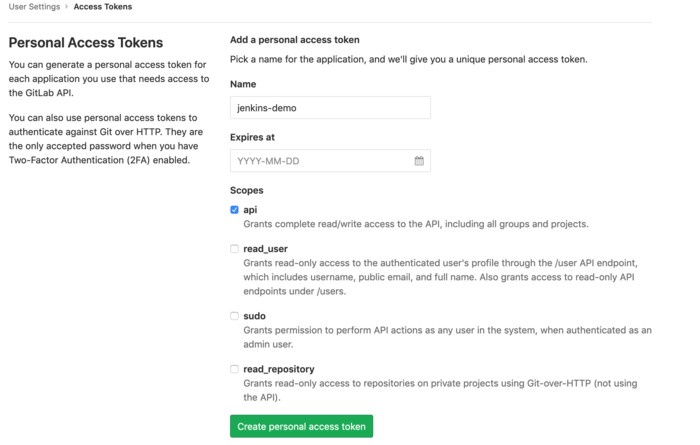
copy your token to an editor, because you need it later.

Go back to Jenkins in the submenu for creating credential and add create a credential set:

If there is no “GitLab API token” in the “Child” menu, the Gitlab plug-in must be installed first. API token is the token which has been created a step before.
Create a pipeline project
Now the basic configuration as been done and the pipeline project can be created. For a new project/pipeline click on “New Item” on the dashboard. A wizzard will help you to create the pipeline project.
There are many project types with different functions. But for the demo case we will create a “Pipeline Project”.
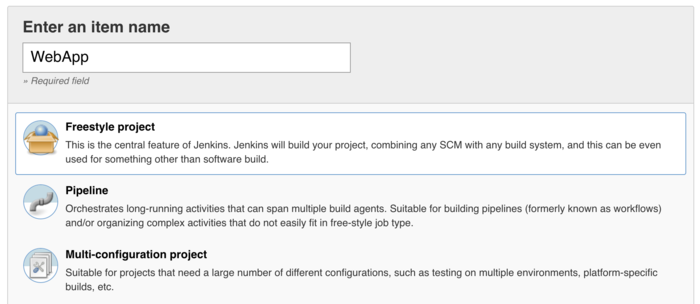
The pipeline project is seperated in four diffrent Sections:
- General
- Build Triggers
- Advanced Project Options
- Pipeline
General
In the General section you define basic setting of the project. In this case here there is nothing to do.
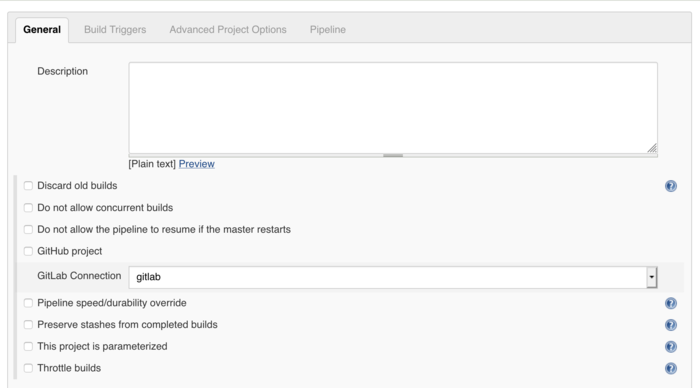
Build Triggers
In Build Triggers you define how the pipeline would started. The demo build will start when a new commit will be published on gitlab.
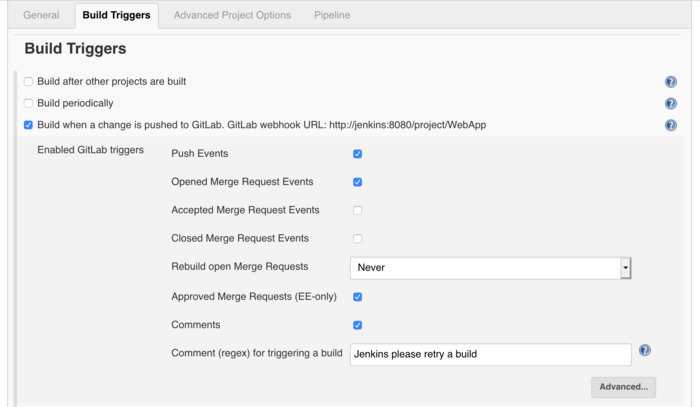
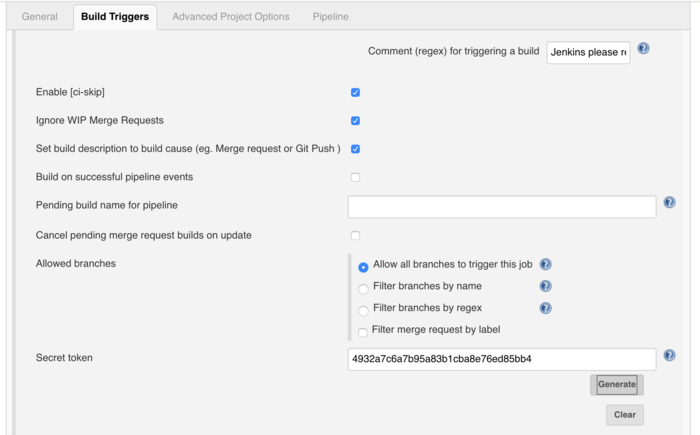
The point “Build when a change is pushed to GitLab. GitLab webhook URL: http://jenkins:8080/project/WebApp” must be enabled. In the background a Webhook link will be created which will be added to the gitlab project. For the webhook you need a security token which can be created under advenced:
Advanced Project Options
Here is nothing to configure :-)
Pipeline
In the last section you add your pipeline script to the project. The easiest way is to link the “Jenkins”-File to the file on your gitlab/github project.
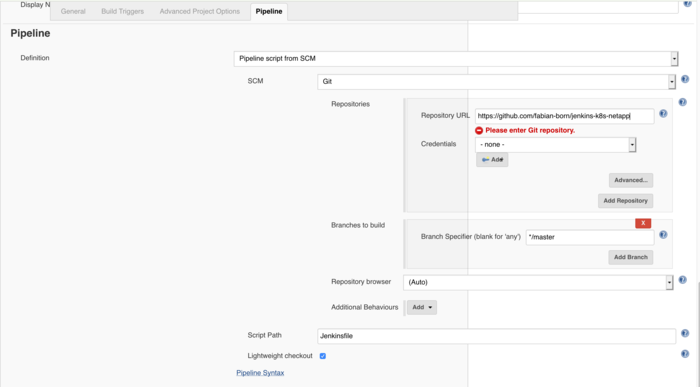
The Demo uses this Jenkinsfile:
podTemplate(label: 'mypod', containers: [
    containerTemplate(name: 'docker', image: 'docker', ttyEnabled: true, command: 'cat'),
    containerTemplate(name: 'kubectl', image: 'lachlanevenson/k8s-kubectl:v1.8.0', command: 'cat', ttyEnabled: true),
    containerTemplate(name: 'helm', image: 'lachlanevenson/k8s-helm:v2.7.2', command: 'cat', ttyEnabled: true)
  ],
  volumes: [
    hostPathVolume(mountPath: '/var/run/docker.sock', hostPath: '/var/run/docker.sock'),
  ]) {
    node('mypod') {

        deleteDir()

        stage("Checkout") {
            checkout scm
        }
        stage('Build and Push Container') {
            container('docker') {

                withCredentials([[$class: 'UsernamePasswordMultiBinding',
                        credentialsId: 'docker-hub-cred',
                        usernameVariable: 'DOCKER_HUB_USER',
                        passwordVariable: 'DOCKER_HUB_PASSWORD']]) {

                    sh "docker build -t DOCKER_HUB_USER/webapp:${env.BUILD_NUMBER} ."
                    sh "docker login -u DOCKER_HUB_USER -p ${env.DOCKER_HUB_PASSWORD} "
                   sh "docker push DOCKER_HUB_USERwebapp:${env.BUILD_NUMBER} "
                }
            }
        }
        stage("Create Test instance") {
            container('helm') {

               sh "helm install --name test --set service.nodePort=30001,cloneSource=prod,webappImage.tag=${env.BUILD_NUMBER} helm/webapp"
            }
        }

        stage ("Automated Test Cases"){

          // give the container 10 seconds to initialize the web server
          sh "sleep 10"

          // connect to the webapp and verify it listens and is connected to the db
          //
          // to get IP of jenkins host (which must be the same container host where dev instance runs)
          // we passed it as an environment variable when starting Jenkins.  Very fragile but there is
          // no other easy way without introducing service discovery of some sort
          echo "Check if webapp port is listening and connected with db"
          // sh "curl http://192.168.42.5:30001/v1/ping -o curl.out"
          // sh "cat curl.out"
          // sh "awk \'/true/{f=1} END{exit!f}\' curl.out"
          echo "<<<<<<<<<< Access this test build at http://192.168.42.5:30001 >>>>>>>>>>"
        }
        def push = ""
        stage ("Manual Test & Approve Push to Production"){
          // Test instance is online.  Ask for approval to push to production.
          // notifyBuild('APPROVAL-REQUIRED')
          push = input(
            id: 'push', message: 'Push to production?', parameters: [
              [$class: 'ChoiceParameterDefinition', choices: 'Yes\nNo', description: '', name: 'Select yes or no']
            ]
          )
        }

        stage('Deploy in Production') {
            container('kubectl') {
                sh "sleep 10"
                withCredentials([[$class: 'UsernamePasswordMultiBinding',
                        credentialsId: 'docker-hub-cred',
                        usernameVariable: 'DOCKER_HUB_USER',
                        passwordVariable: 'DOCKER_HUB_PASSWORD']]) {

                    sh "kubectl set image deployments/prod-webapp webapp=dockerhubaccount/webapp:${env.BUILD_NUMBER}"
                }
            }
        }
        stage('Delete test instance') {
            container('helm') {

               sh "helm delete --purge test"
            }
        }
    }
}
Outlook to Part 3
In the next article I want to show you how NetApp comes into play here.
- Cloning with NetApp Trident